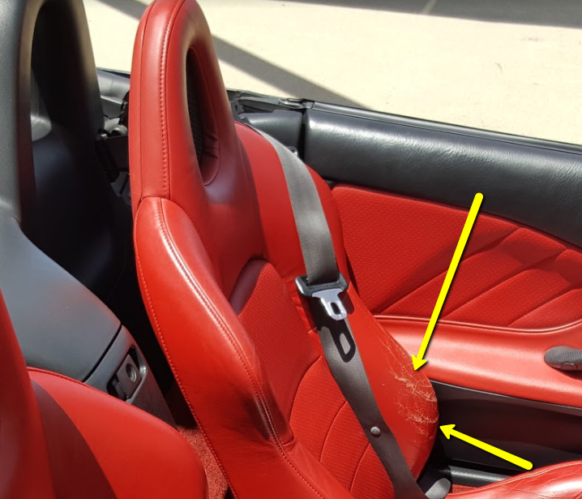
I decided to invest in some Clazzio seat covers to address some wear issues on the driver’s side seat. The side bolster was rubbed raw and the dye job I attempted didn’t yield the results I had hoped for. It is super hard to match aged leather with new dye unless you are adept at mixing your own color, which I am not. Rather than go all out and buy new skins for the seats and having it professionally done at an upholstery shop (I figured $1200 for skins and labor) I decided to try out a set of these seat covers. Anyone who looked at my current seats would think I am crazy for trying to cover them up since they are in pretty darn good shape but I am looking to get this car as perfect as I can at a minimum expense.
I ended up ordering a set of Clazzio leather covers from GoTuning.com in full red. I did like the black/red model but my car is an original full red seat so I wanted to remain that way. The only thing I didn’t like before ordering was the fact that I am going to lose the honeycomb vented head rest since it will be covered. I like that look on the car, but maybe the full head rest will grow on me.
The Process:

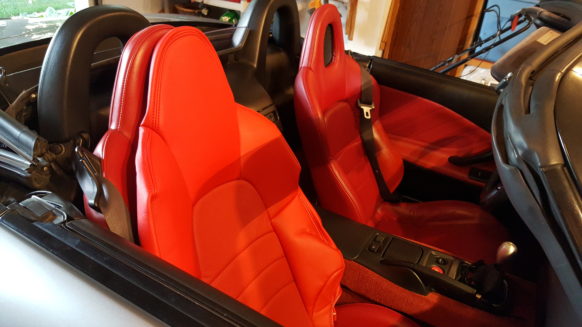
Nothing against Clazzio seat covers. The red doesn’t match and I am sure they use a standard red for all makes and models of seat covers. These just aren’t for me and not worth losing my head rest vents over.

Copyright 2024 Sledgehammer Performance - All Rights Reserved