Editors note: Please read this article in its entirety. The first section is my failed attempt at correcting the seat bolster wear. After learning much more about leather, the second section (Try Number Two at Fixing the Bolster) is how to do it right and get a result.
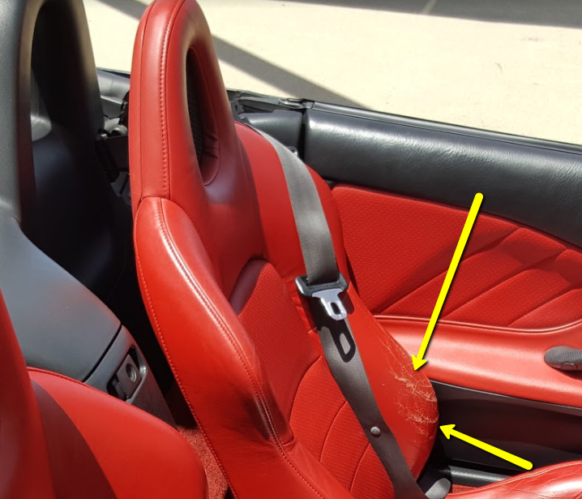
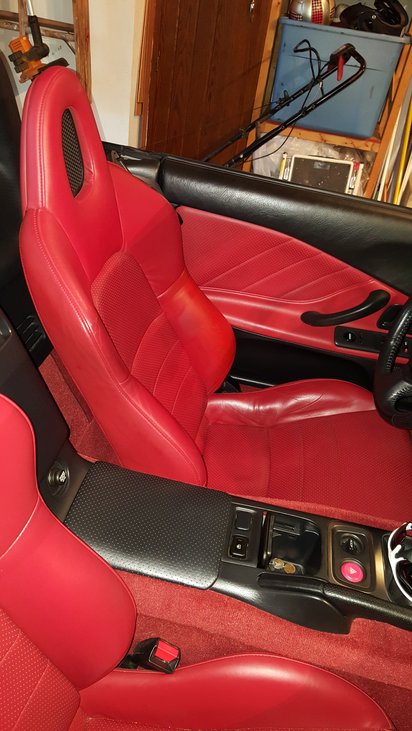
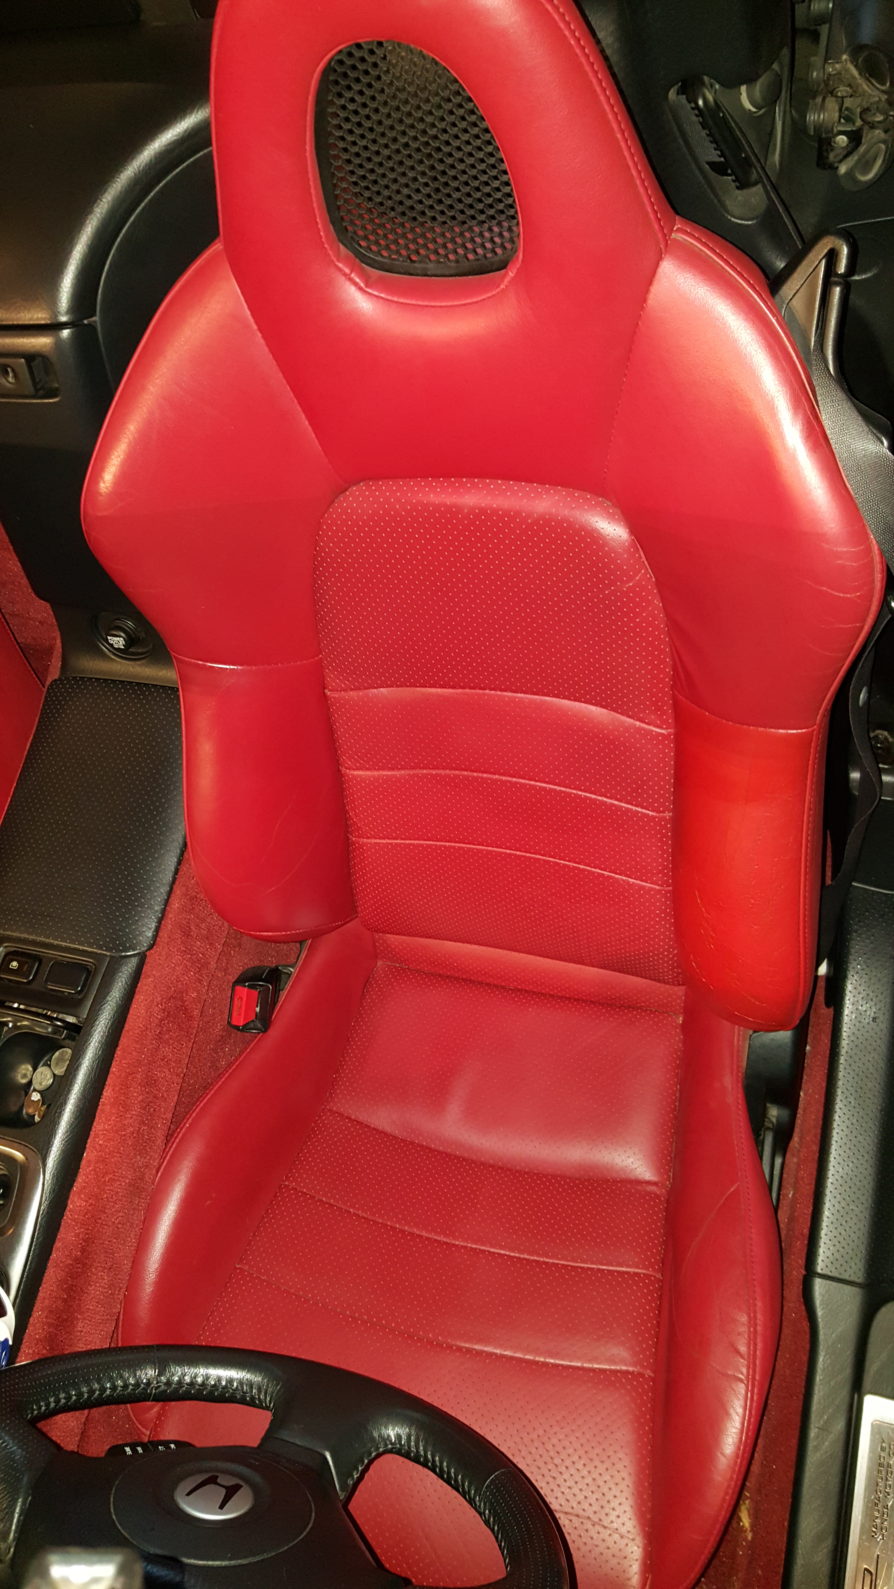
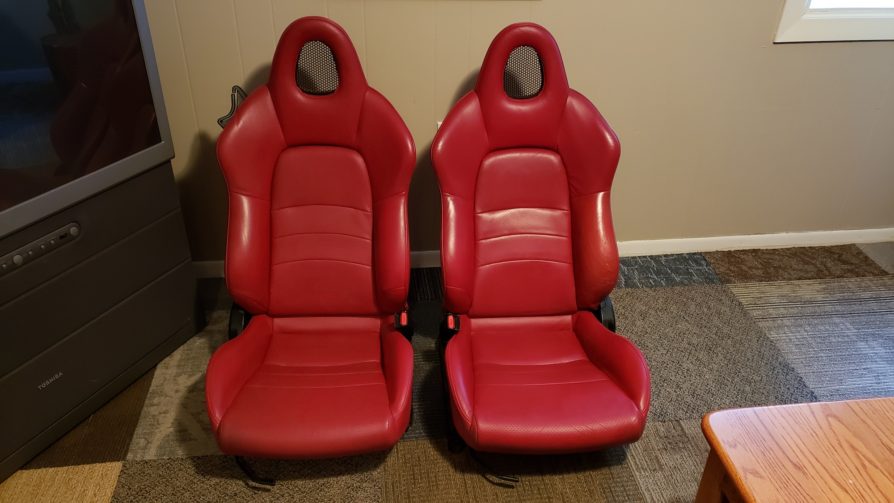
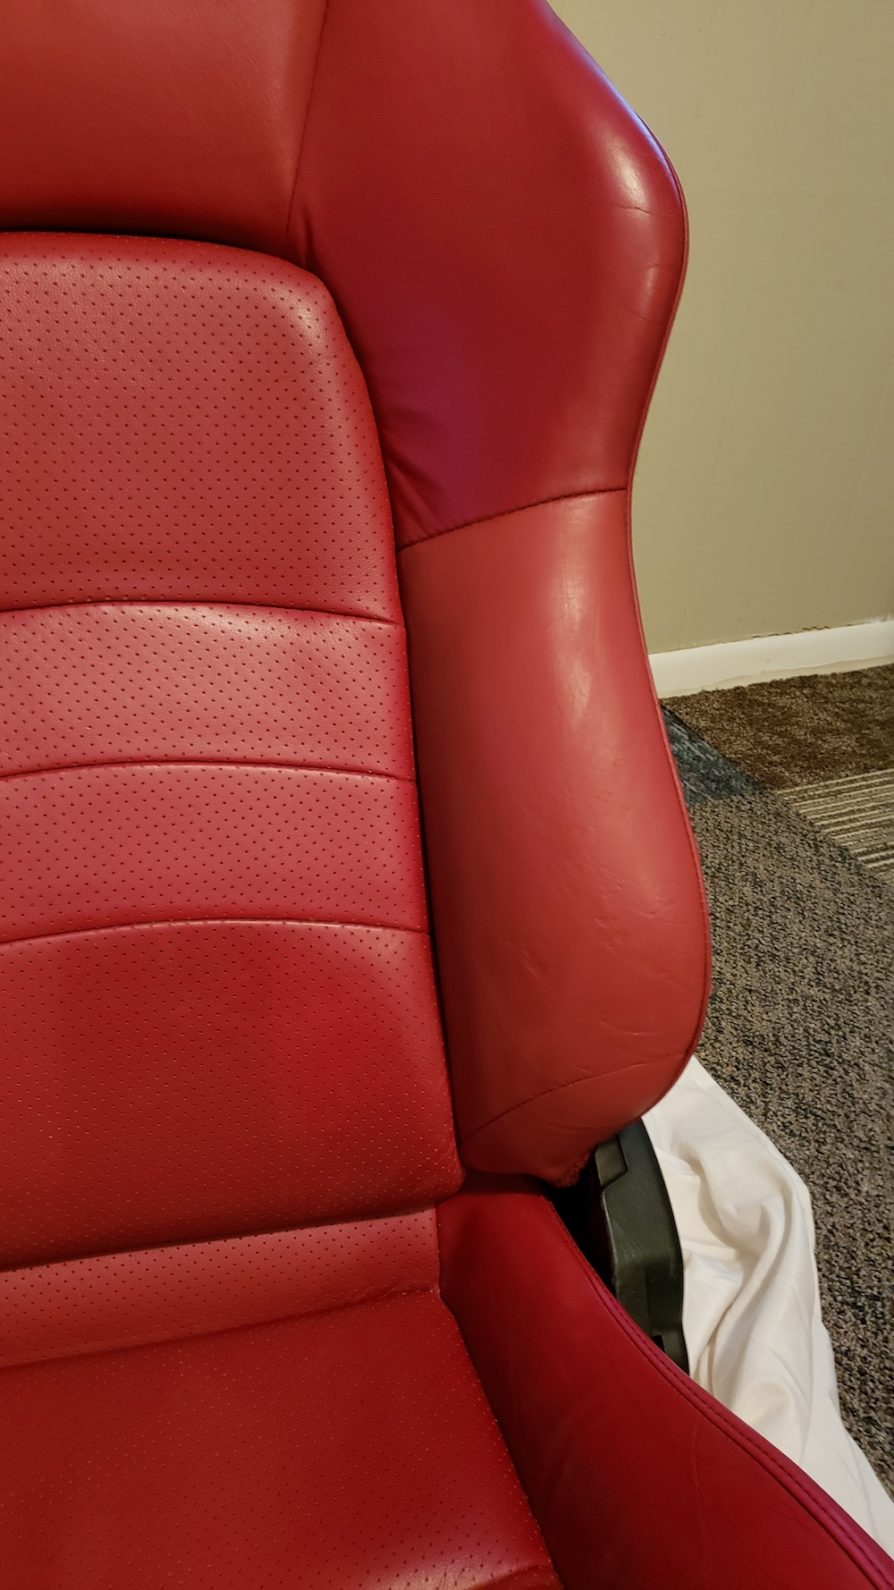
My car is a 2001 and suffers from the classic bolster wear as shown below. This is a result of brushing against the bolster THOUSANDS of times over the years. I decided to purchase an aerosol can of Honda 89 Red dye from a manufacturer who will not be mentioned here. My goal was to return the bolster to an acceptable appearance while not trying to repair “too much” of the leather. I wanted to keep the repair area as small as possible so if it isn’t a 100% clean match it will at least look acceptable. Bear in mind that I am by no means an expert on leather and upholstery but I felt comfortable doing this on a small area that wasn’t severely damaged.
THE PROCESS:
I am not pleased with the results. It is less noticeable and doesn’t look worse than it was but 89 is not the correct shade for the AP1. There is definitely an orange tint in this red.
Honda actually made three different reds in the 99-07 production run.
00-03 R153L Vivid RED – (Vivid Red)
04-05 NH167 RED2
06-07 R145L New Pure Red
Don’t be fooled by all of the dye sites out there. They all claim Honda 89 on the color chart is the right red for 1999-2007 but I can assure you that it is NOT correct. I believe 89 is correct for only 2004-2005. Don’t quote me on that and I’d say you are best off sending in a piece of your door card to have it custom matched IF it is red like mine.
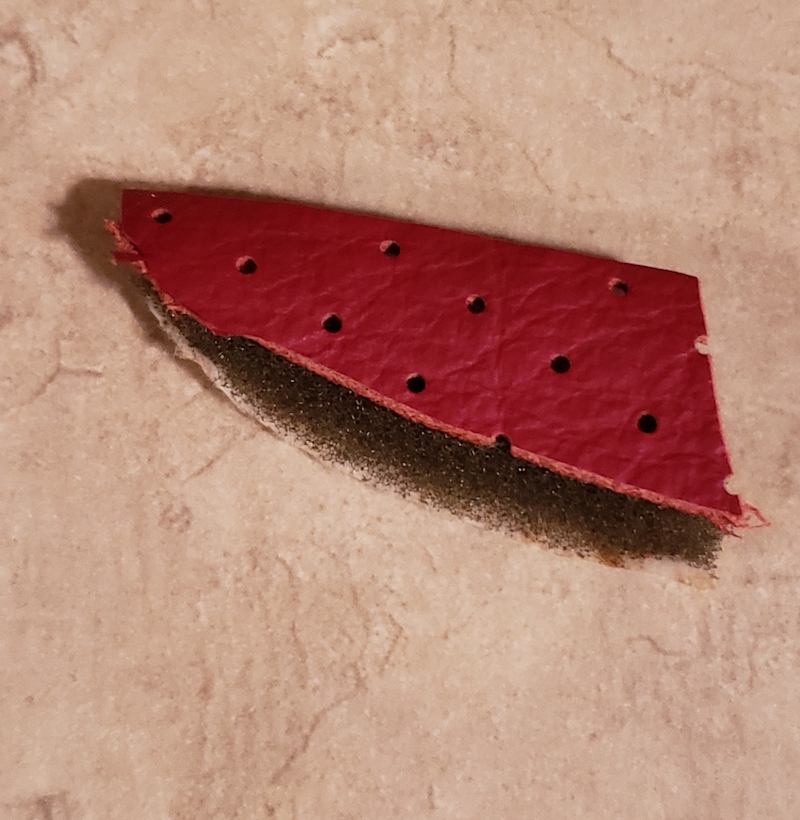
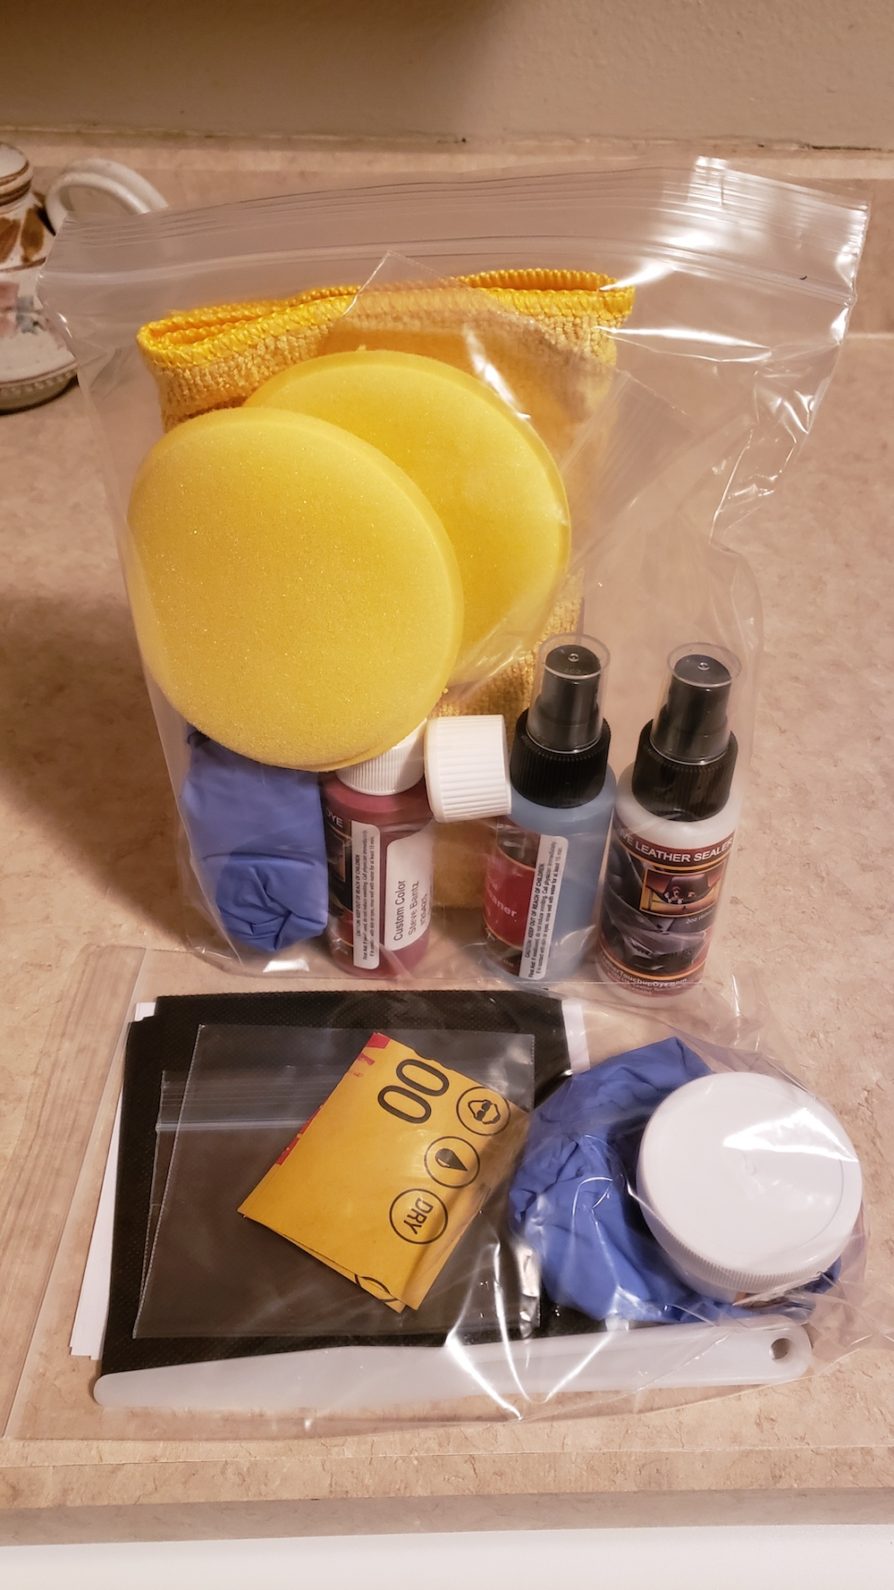
I admittedly didn’t go through the right process with my first try but I am new to refinishing leather and have learned a lot. I finally got a custom mix of red for the Honda after sending in a piece of the door card to be matched. I actually removed the interior door panel and cut a piece of door card leather from the back side overlap. I ordered a one seat kit from leathertouchupdye.com which included leather cleaner, filler with putty knife, dye, sandpaper, sponges and sealer. I ordered the 2oz kit because I was just going to dye one seat and I think 2oz will be enough for both seats from what I have heard from others. The passenger seat just needs a light coat of dye since it is in great shape. I do want to do both of them so they match perfectly.
I first steam cleaned both seats with my Dupray Neat steamer so that they would be completely cleaned and the pores unclogged. After it dried, I applied the leather cleaner solution to both seats and let it dry again, helped by a hair dryer. Just spray it on the microfiber towel and on the surface of the bolster and rub away. Make sure to dry completely because any moisture can act as a barrier when the dye needs to be absorbed.
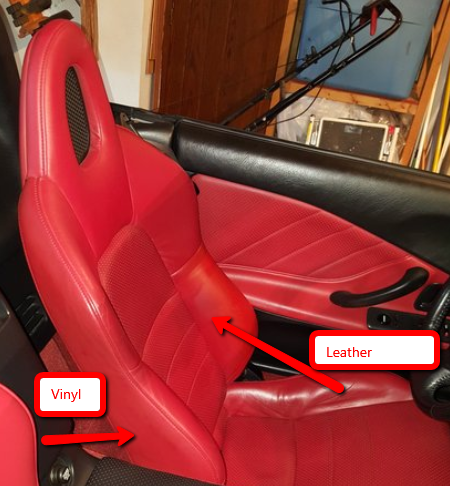
Editors note: It is important to note that you should only be dying the leather portions of the seat. All of the surfaces that touch your body are leather. Everything else is vinyl including the back of the seat. What this means is, when dying the bolsters only dye out to the outer seam stitching. The outside edges of the bolsters are vinyl and won’t take dye the same way. You could end up with a mess.
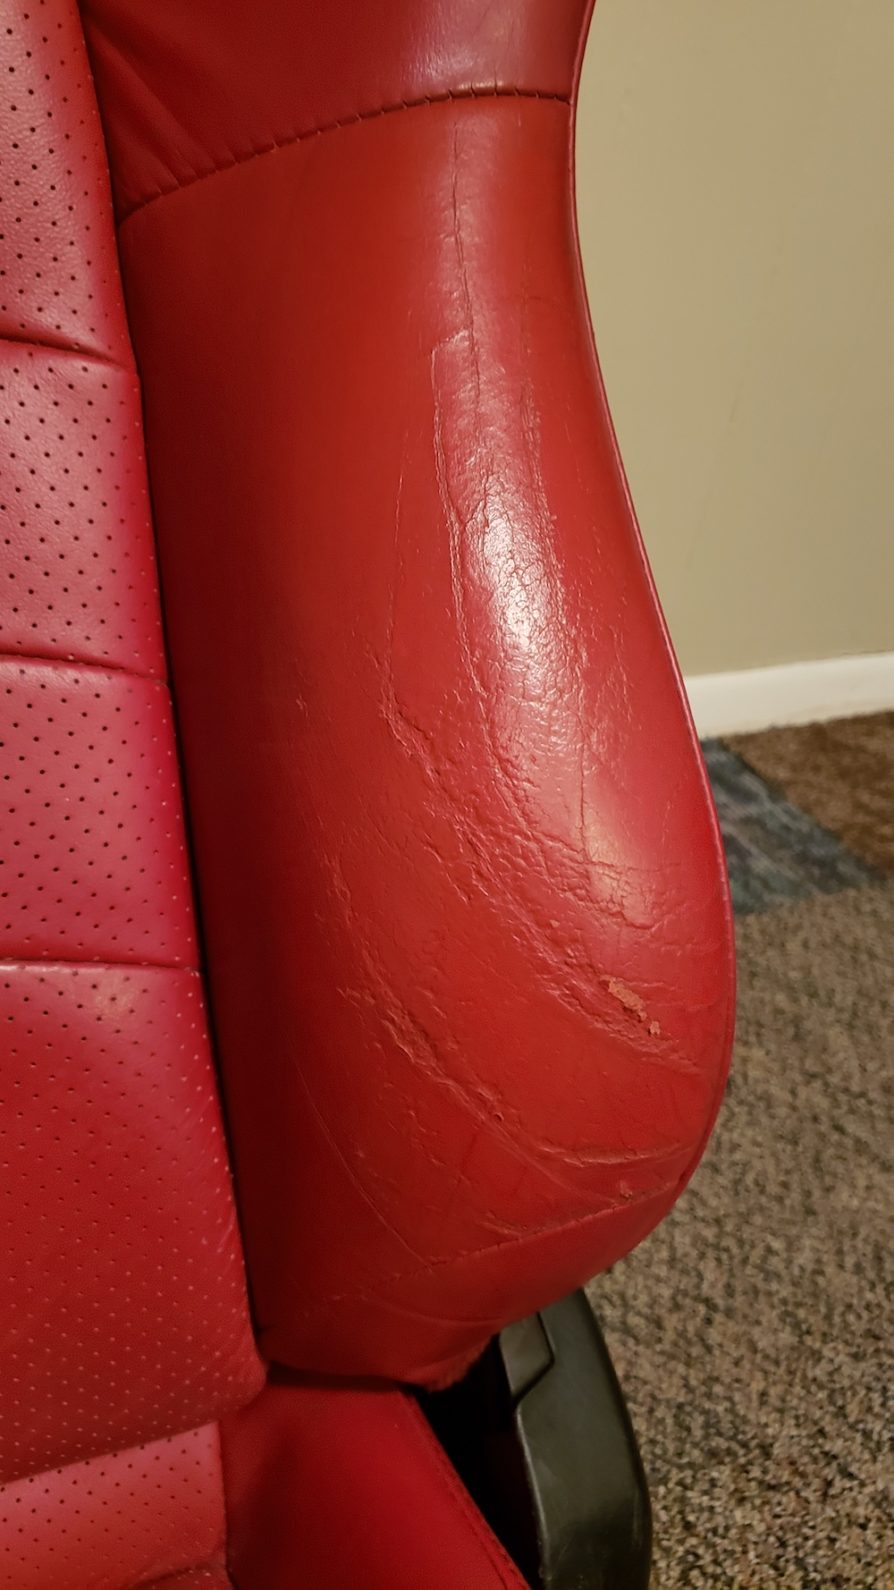
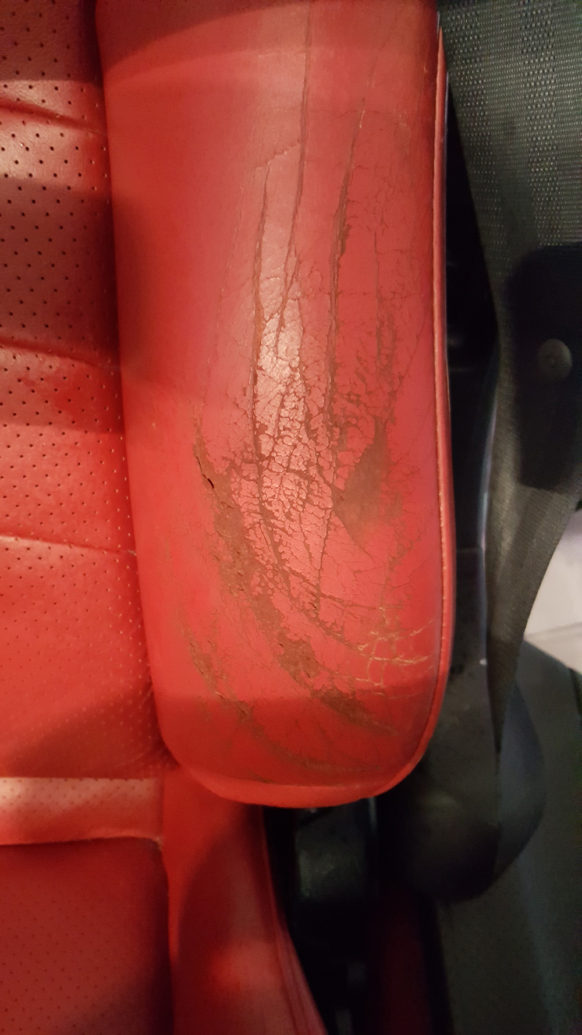
Next I applied the leather filler cream to the cracks in the upper bolster on the driver’s side with the supplied plastic knife. It is important to just fill the cracks as you slide the putty knife over the leather. It will get where it needs to be. You don’t need to fill everything you see because that is the character of the leather and doesn’t need to be hidden. I just filled in missing areas of the bolster where leather had fallen away revealing suede-ish indented textures. Once that stage was complete and dried, I sanded the filler with the provided sandpaper which is approximately 600 grit. Very light strokes are recommended. Once I was satisfied with the result, it was time to dye. Take your time on this and don’t be in a hurry. The picture below represents the driver’s side seat, entirely clean, the bolster cracking repaired and ready to accept dye. It looks like a ton of filler but it really isn’t. This is about a thimble full of material but the picture does illustrate how tatty my bolster really was.
The seat was now ready to be totally dyed. Remember that prep work is key because the leather needs the pores unclogged and the surface clean/dry so it is ready to accept dye. You don’t want anything impeding absorption of dye at all. I wanted to do the whole seat in case there was any variance in the shade of the red to ensure consistency. I did end up just doing the bolster alone first just to see how close the custom color mix matched the rest of the seat. It was pretty much spot on but I decided to dye the whole seat anyway just to make sure it was as good as I could get it.
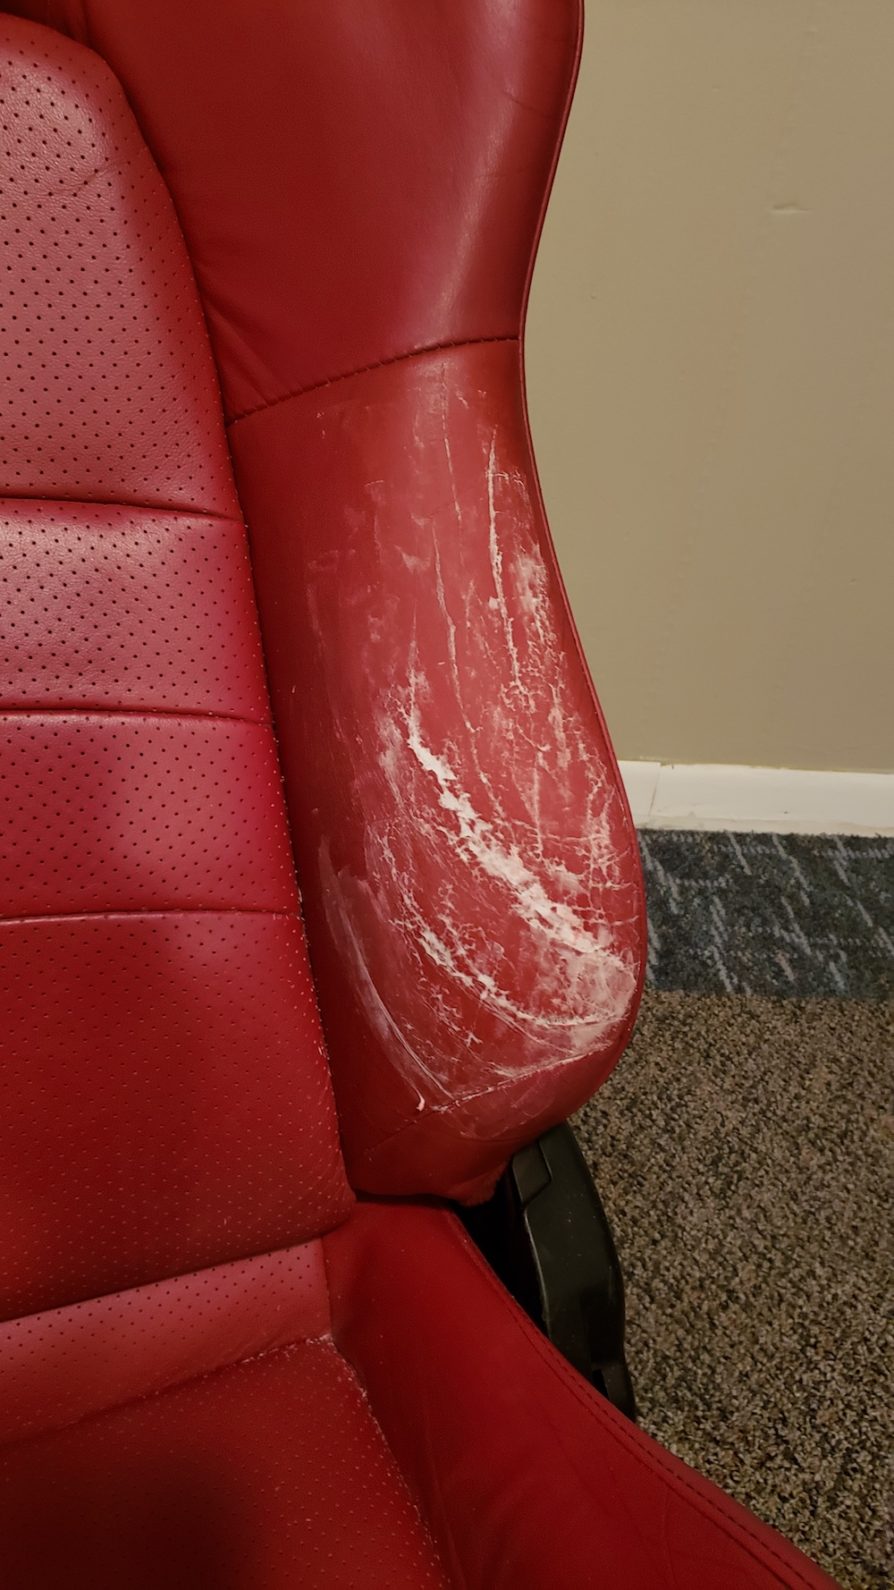
Using gloves and the supplied sponge, the dye was applied in circular strokes paying close attention to even coverage. On the first pass, you just want to lay a base layer of dye to see how things are shaping up. You may need to dab it into creases and areas where filler was applied. You can clearly see in the picture below that there is a marked improvement in the bolster even after a couple of coats, each dried with the hairdryer before applying the next. Don’t use a heat gun … only a hair dryer.
After drying the first coat of dye with a hairdryer, I gave it a good look to make sure it was what I wanted. It took about 6 coats of dye to give me the coverage I needed on the bolster but that’s only using 1/10th of the bottle’s 2 ounce contents. They key is to use very light pressure on the sponge. For the last coat I used more of a dabbing method. I dried it a final time with the hair dryer until I could run a gloved hand across it without staining the glove.
The leather may look a little weird before you apply the sealer but realize that it is the sealer that will even everything out. I just sprayed a new sponge evenly with the sealer and wiped it on with even strokes making sure to have a light touch and use a circular motion to avoid streaking. It is important to do the whole seat quickly so it has the same consistent finish. It didn’t end up being as shiny as I expected but I am now wondering if it just needs to cure and then be treated with lotion to blend it with the rest of the seat.
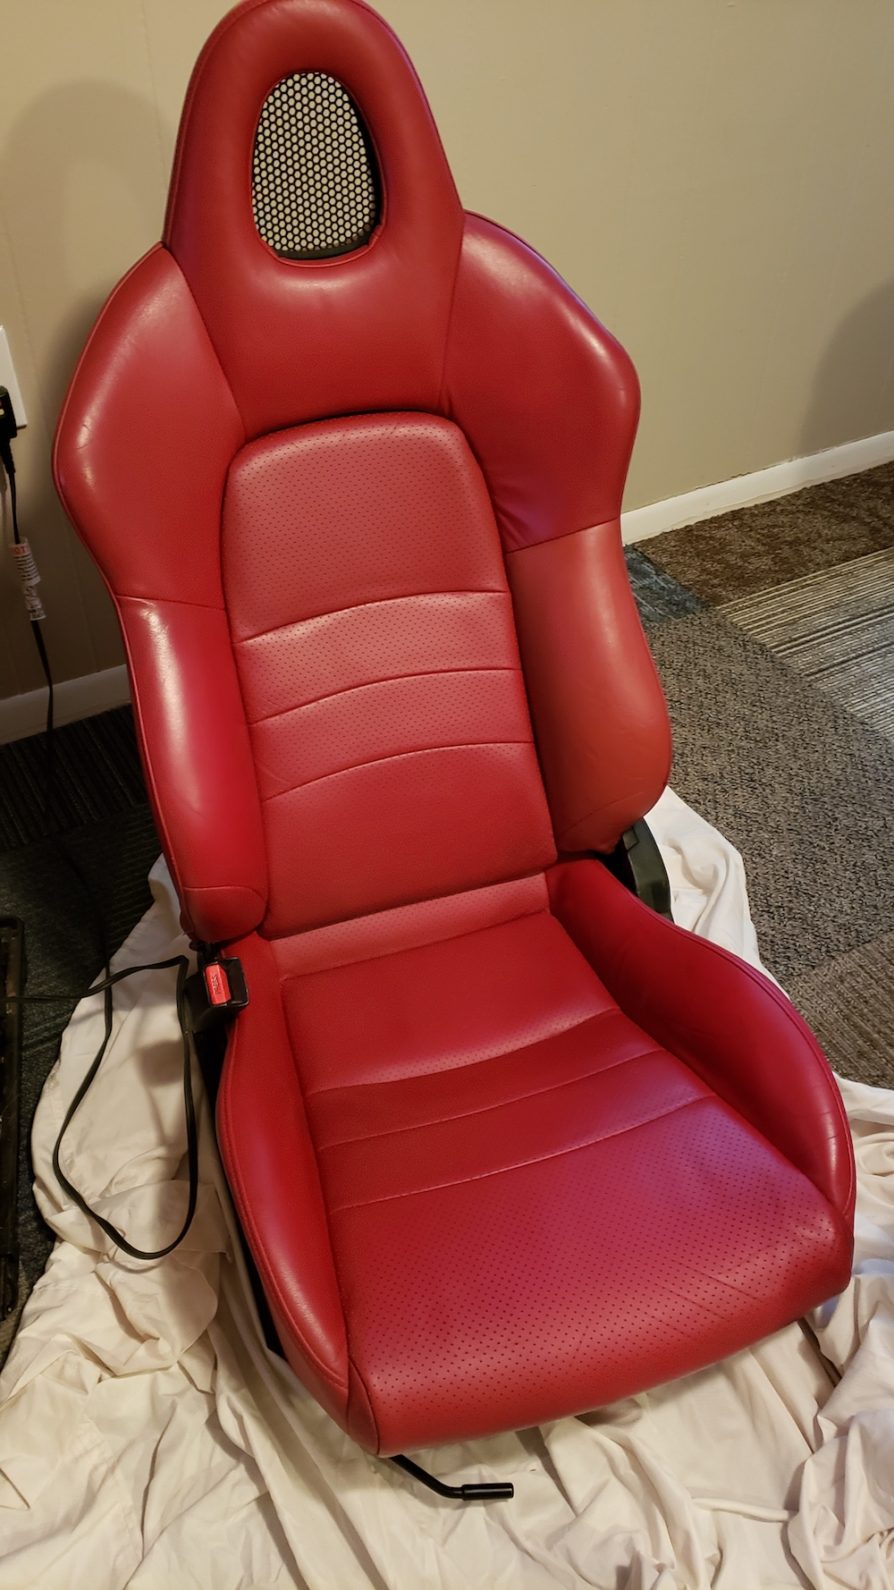
The picture below is the finished driver’s side seat before treating it with leather conditioner. I am hoping the conditioner darkens it and gives it a sheen.
Here is a picture of the seat after a treatment of Surf City Garage Voodoo Leather Treatment. It looks a little better but you can still notice a slight difference in the shade of red.
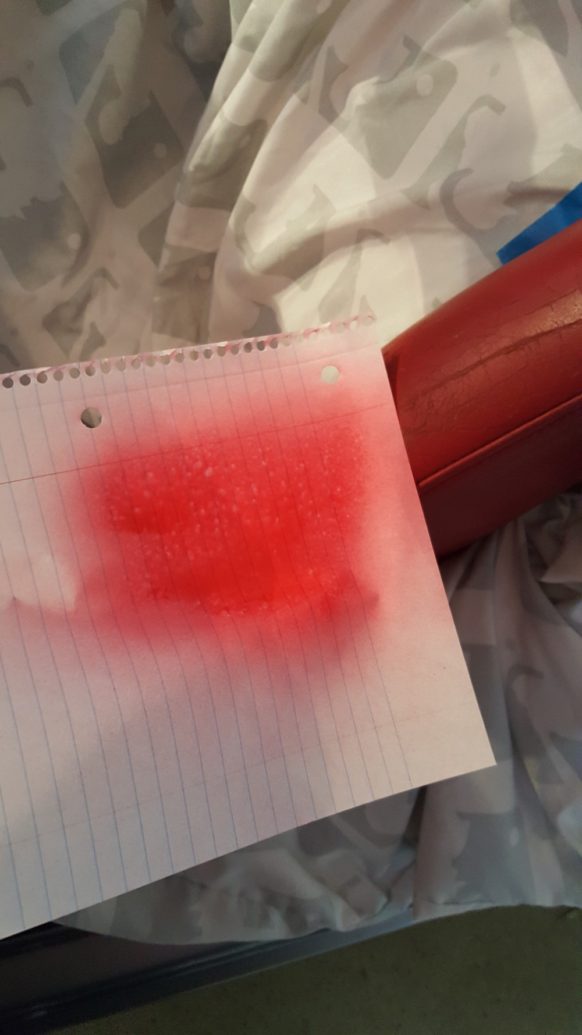
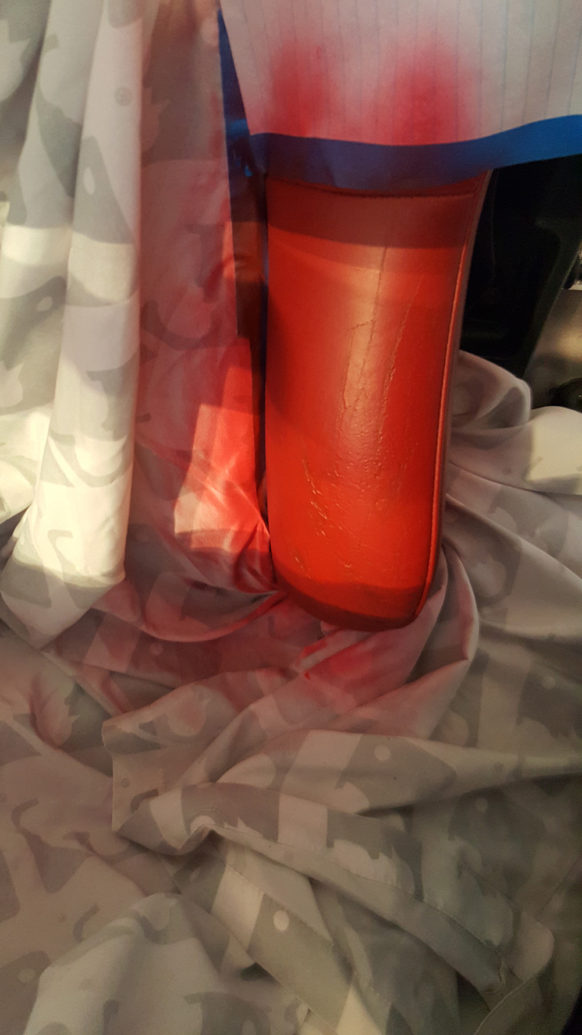
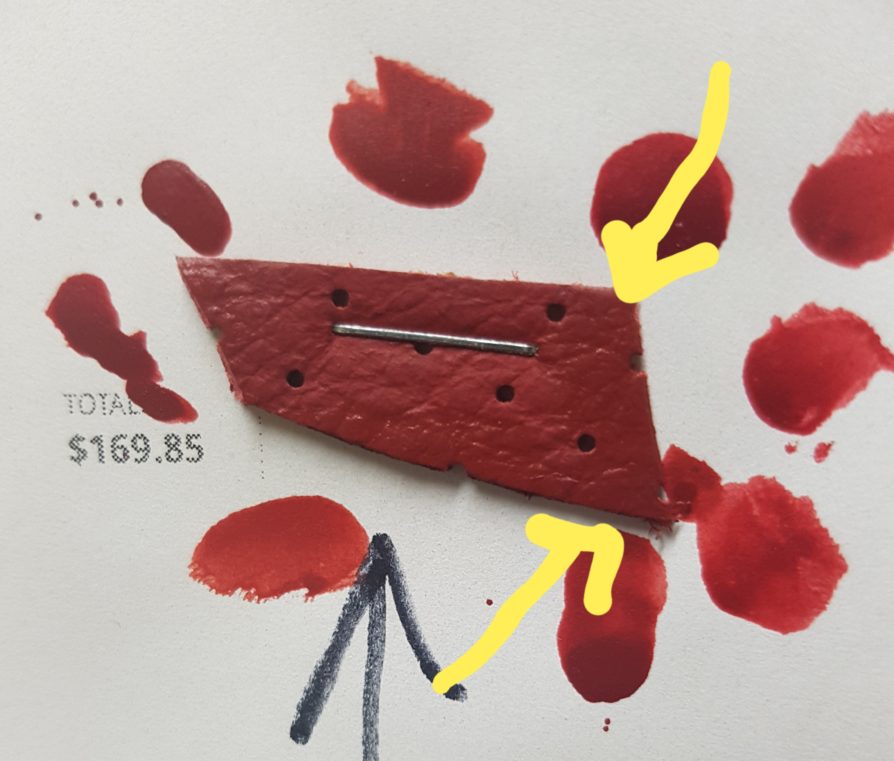
I was kind of disappointed in my result and not being a leather or upholstery expert, I consulted the manufacturer for some advice. They were very nice and showed me how the dye matched my sample and I agreed fully. They explained that my door card sample had not aged the same as my seats, i.e. the seats had darkened a bit from many years of treatments. The picture below shows how well they matched my provided sample.
They suggested that I apply more coats of red since it remains a bit translucent by nature. I am going to clean the area and strip the sealer so I can put more coats on and then hope that the red eventually comes into line after absorbing lotion and hopefully darkening it a bit.
So here is the seat after stripping off the sealer and reapplying dye:
Do yourself a favor and spend the money for a proper kit like the one I got from leathertouchupdye.com. It is worth it and this is the only way to get a result that the car deserves. Hopefully you have better luck at matching the depth of color than I did. I have $170 in this repair.

Copyright 2024 Sledgehammer Performance - All Rights Reserved